GCSE
Physics
-
Introduction to GCSE Physics (AQA) Coming soon
-
1.1 Energy Stores, Transfers and Power
-
1.2 Conservation and Dissipation of Energy Coming soon
-
1.3 National and Global Energy Resources Coming soon
-
2.1 Current, Potential Difference and Resistance Coming soon
-
2.2 Series and Parallel Circuits Coming soon
-
2.3 Domestic Uses and Safety Coming soon
-
2.4 Energy Transfers Coming soon
-
2.5 Static Electricity Coming soon
-
3.1 Changes of State and the Particle Model Coming soon
-
3.2 Internal Energy and Energy Transfers Coming soon
-
3.3 Particle Model and Pressure Coming soon
-
4.1 Atoms and Isotopes Coming soon
-
4.2 Atoms and Nuclear Radiation Coming soon
-
4.3 Hazards and Uses of Radioactive Emissions and of Background Radiation Coming soon
-
4.4 Nuclear Fission and Fusion Coming soon
-
5.1 Forces and their Interactions Coming soon
-
5.2 Work Done and Energy Transfer Coming soon
-
5.3 Forces and Elasticity Coming soon
-
5.4 Moments, Levers and Gears Coming soon
-
5.5 Pressure and Pressure Differences in Fluids Coming soon
-
5.6 Forces and Motion Coming soon
-
5.6.1 Describing Motion Along a Line
-
5.6.2 Distance and Displacement
-
5.6.3 Speed
-
5.6.4 Velocity
-
5.6.5 The Distance–Time Relationship
-
5.6.6 Acceleration
-
5.6.7 Forces, Accelerations and Newton's Laws of Motion
-
5.6.8 Newton's First Law
-
5.6.9 Newton's Second Law
-
5.6.10 Newton's Third Law
-
5.6.11 Forces and Braking
-
5.6.12 Stopping Distance
-
5.6.13 Reaction Time
-
5.6.14 Factors Affecting Braking Distance
-
5.6.1 Describing Motion Along a Line
-
5.7 Momentum [HT] Coming soon
-
6.1 Waves in Air, Fluids and Solids Coming soon
-
6.2 Electromagnetic Waves Coming soon
-
6.3 Black Body Radiation Coming soon
-
7.1 Permanent and Induced Magnetism, Magnetic Forces and Fields Coming soon
-
7.2 The Motor Effect Coming soon
-
7.3 Induced Potential, Transformers and the National Grid [HT] Coming soon
-
8.1 Solar System; Stability of Orbital Motions; Satellites Coming soon
-
8.2 Red-Shift Coming soon
-
9.1 Required Practicals Coming soon
-
9.1.1 Required Practical Activity 1
-
9.1.2 Required Practical Activity 2
-
9.1.3 Required Practical Activity 3
-
9.1.4 Required Practical Activity 4
-
9.1.5 Required Practical Activity 5
-
9.1.6 Required Practical Activity 6
-
9.1.7 Required Practical Activity 7
-
9.1.8 Required Practical Activity 8
-
9.1.9 Required Practical Activity 9
-
9.1.10 Required Practical Activity 10
-
9.1.1 Required Practical Activity 1
1. Energy
In this lesson, we will explore the properties and behaviour of convex and concave lenses. We will learn about the principal focusWhat the writer draws attention to at a given moment (e.g., setting, character, detail)., focal length, and the use of ray diagrams to illustrate image formation. Additionally, we will delve into the concept of magnificationThe number of times larger an image appears compared to the real object. and how it can be calculated using the image and object height measurements. A lens forms an image by refracting light.
Convex Lenses
A convex lens is thicker at the centre and thinner at the edges.
- Principal Focus: Parallel rays of light passing through a convex lens converge and come to a focus at a specific point called the principal focus.
- Focal Length: The distance from the lens to the principal focus is referred to as the focal length.
- Ray Diagrams: Ray diagrams are graphical representations used to illustrate the formation of images by convex lenses.
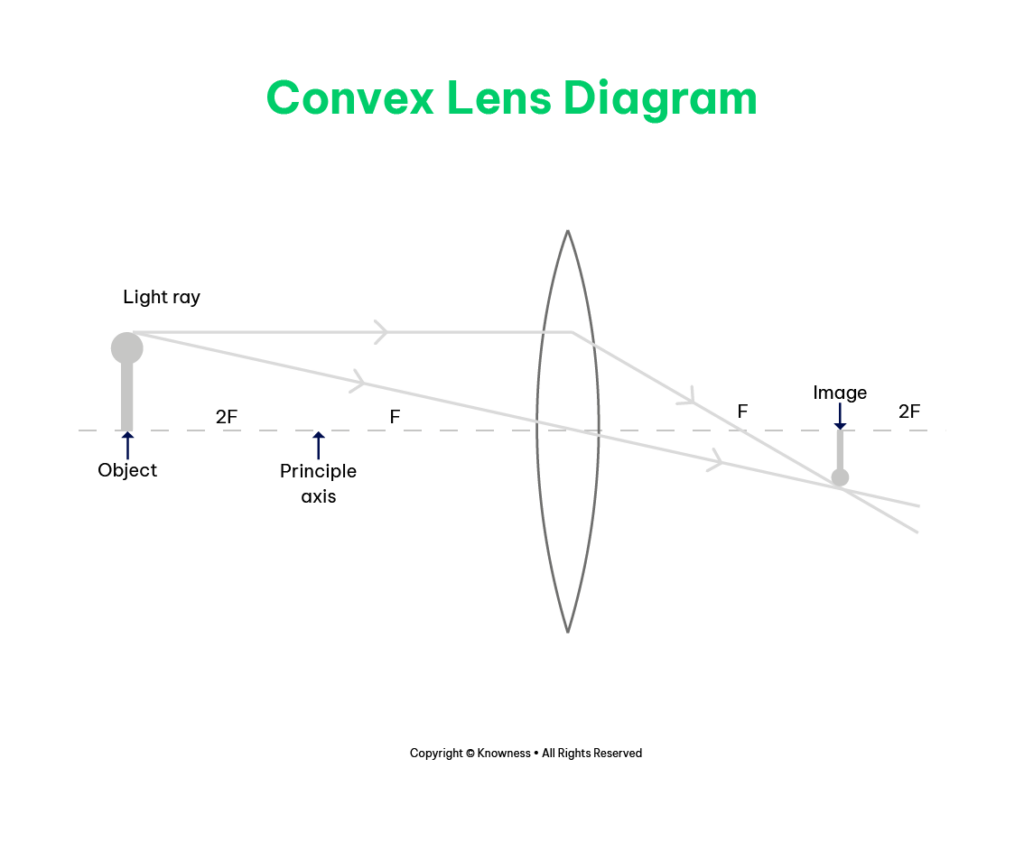
Image Formation by Convex Lenses:
- Real Image: If the object is placed beyond the focal point, a real image is formed on the opposite side of the lens. It can be projected onto a screen and is inverted.
- Virtual Image: If the object is placed within the focal length, a virtual image is formed on the same side as the object. It cannot be projected onto a screen and is upright.
Concave Lenses
- A concave lens is thinner at the centre and thicker at the edges.
- Principal Focus: When parallel rays of light pass through a concave lens, they appear to diverge. Extending the diverging rays backward gives the illusion of them coming from a common point, known as the virtual principal focus.
- Ray Diagrams: Similar to convex lenses, ray diagrams can be used to demonstrate image formation with concave lenses.
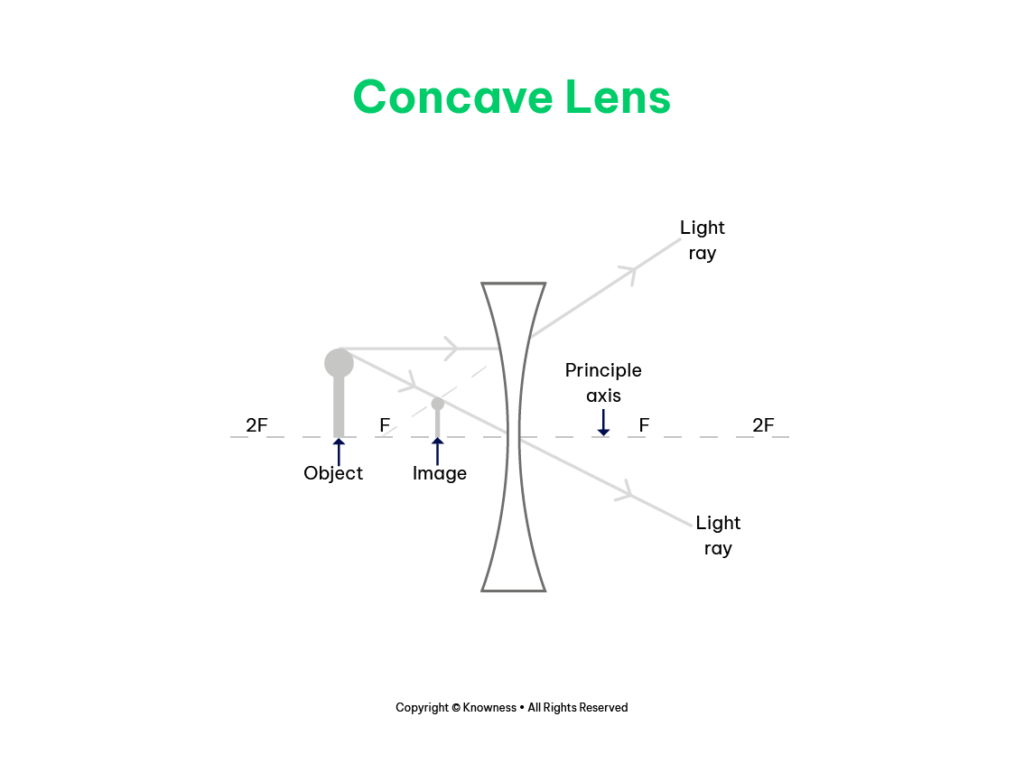
Image Formation by Concave Lens:
- Virtual Image: A concave lens always forms a virtual image. The image is erect, reduced in size, and cannot be projected onto a screen.
Ray Diagrams for Lenses
Ray diagrams are graphical tools that help visualise the path of light rays and determine the characteristics of the image formed by a lens.
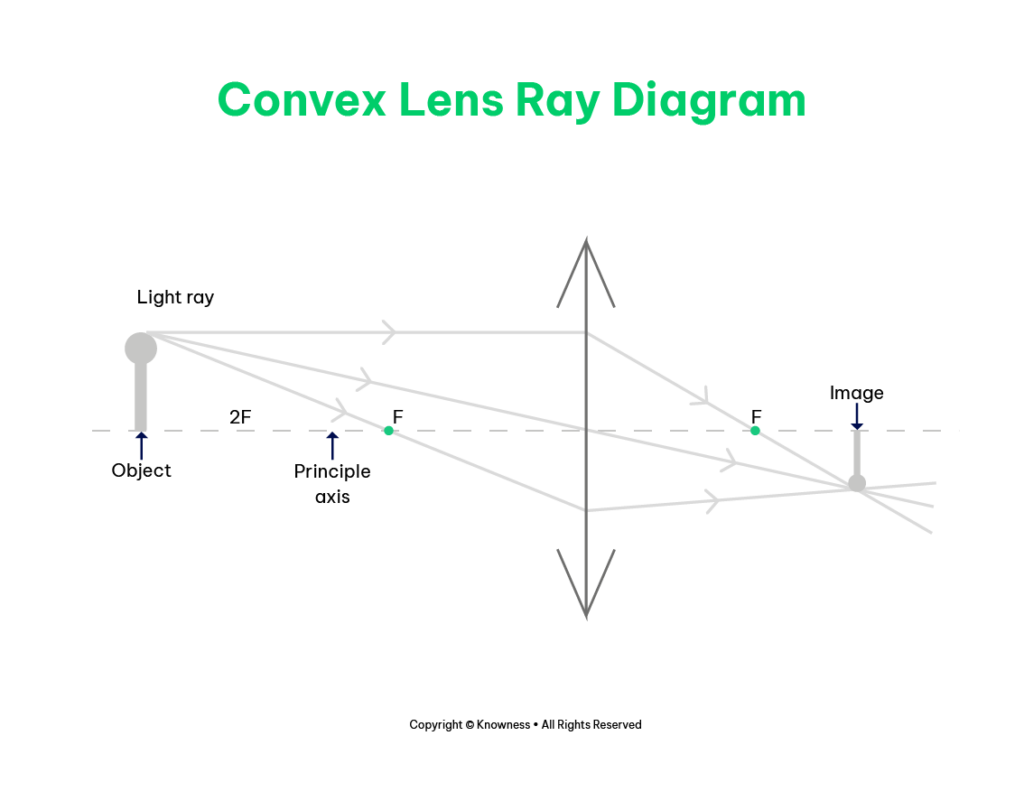
- For convex lenses, at least two rays (e.g., parallel ray and central ray) are drawn to intersect at the principal focus or appear to diverge from it.
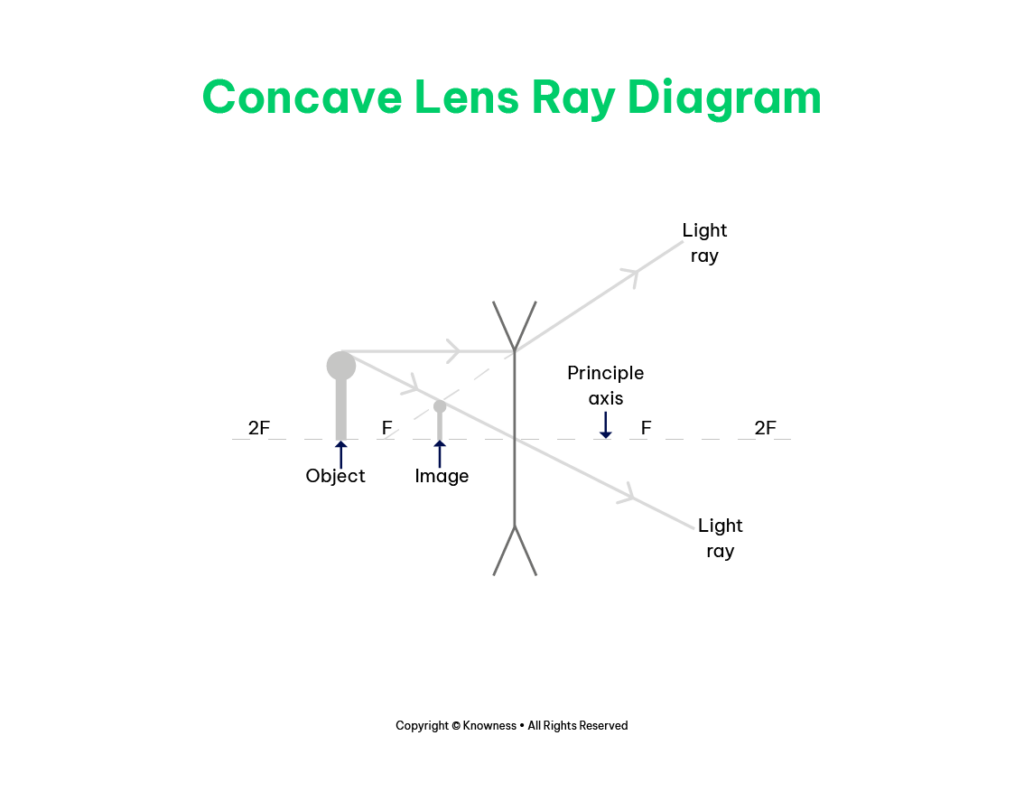
- For concave lenses, the rays appear to diverge from the virtual principal focus or can be extended backward to show their path.
Magnification Calculation
Magnification is a measure of how much larger or smaller an image appears compared to the object. It can be calculated using the equation:
magnification = image height / object height
The magnification is a ratio and has no units. Both the image height and object height measurements should be taken in either millimetres (mm) or centimetres (cm).
Conclusion
Lenses play a vital role in forming images through the refraction of light. Convex lenses converge light rays to a principal focus, creating real or virtual images depending on the object's position. Concave lenses cause light rays to appear to diverge, resulting in the formation of virtual images. Ray diagrams are useful tools to illustrate the image formation process for both convex and concave lenses. Magnification, a measure of image sizeThe measured size of an object as seen under a microscope. compared to the object, can be calculated using the image and object height measurements.
Continue the lesson
This section is available to learners with course access. Continue learning with Knowness to unlock the full explanation, examples, revision tools, and progress tracking.
The remaining lesson content includes further guided explanation, important learning points, and supporting interactive material designed to help you understand and revise this topic.
Unlock this topic to view the full activity, worked examples, common mistakes, and additional revision support.
More content available
Knowness lessons are structured to build understanding step by step. Create an account or upgrade your access to continue from this point.
This preview does not include the hidden lesson text, answers, explanations, or embedded interactions.
Continue learning with Knowness
Sign up to access the full lesson, predicted grades, revision tools, progress tracking, and more.
Create a free account